Summer Lightning (Hopback) Brewing Journal
Recipe:
| Recipe | Measure | |
|---|---|---|
| Pale Malt (EBC 4 or less) | 4.99Kg |
 |
| Challenger Hops (start of Boil) | 46g | |
| Goldings Hops (Last 10 Min of Boil) | 15g | |
| Goldings Hops (End of Boil) | 9g | |
| Yeast | S-04 | |
| Mash Liquor | 14 Litres | |
| Mash Temperature | 66C | |
| Mash Time | 1 Hour 30 Minutes | |
| Sparge Temperature | 77C | |
| Mash Efficiency (estimated) | 75% | |
| Boil Time | 1 Hour 30 Minutes | |
| Batch Volume | 23 Litres | |
| Fermentation Temperature | 20C | |
| Expected OG | 1052 | |
| Actual OG | 1045 | |
| Expected FG | 1013 | |
| Actual FG | 1010 |
Mashing:
- The Mash water (liquor) was heated to around 75C and transferred into the Mash Tun.
- Temperature in the Mash Tun immediately fell to 71C, which seemed like a suitable strike heat.
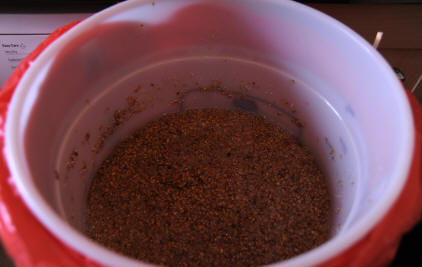
- The grain was then added and well stirred to ensure that no dry pockets existed..
- After about 5 minutes the temperature was checked but was a little too low at 64C.
- As this recipe uses a fair amount of grain, I think the strike heat needs to be a little higher. I added about 1 to 1.5 litres of boiling water, which raised the temperature to 65.9C. Perfect!
- My temperature controller can be seen in the picture below.
- Checked temperature again after 15 minutes, still at 65.9C. Time for a cup of tea.
- After around 40 minute the Mash temperature had risen slightly, to 66.5C. This is still perfect for this recipe, happy days.
Here we can see my Mash Tun, full of grain and doing its best to look like a hot water cylinder. This all looks a bit Heath Robinson but I can assure you that it really does work well.


When the full Hour and a Half had passed, with the Mash temperature staying constant and well within the tolerances, it was time to think about run off and sparging.
Sparging:


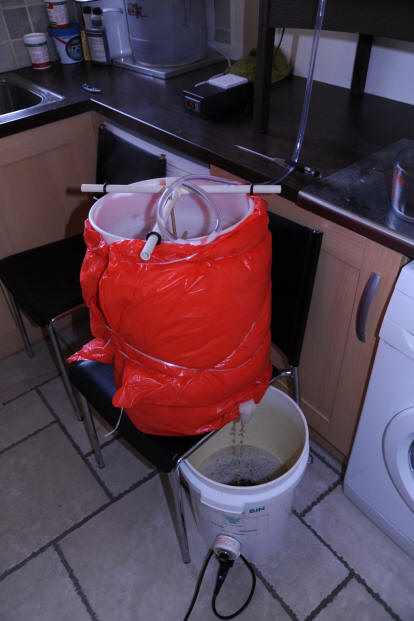
- My Graham Wheeler book suggests that the wort should be completely run off prior to the sparging process commencing. I have used this method in the past but everyone else seems to suggest that fly mashing is better. I have experienced one set mash in the past when using Graham's method, so this time I will be Fly Sparging (balancing sparge water with run off).
- Sparge water was heated to around 80C and then transferred from the boiler into a separate vessel. I need the boiler to take the run off from the Mash Tun.
- A few things had to be moved around to enable the 3 tier set-up required for the sparge, see pictures below.
- My Phils Sparger gizmo was now brought out of retirement to sparge another day. Don't you just love these little gadgets. Very pleasing to watch whirring around.
- The Sparge water was dropping to 76C, so I added a boiling kettle or two to raise it back to 77C
- I also had to clamp the siphon tube on the sparge water supply, as too much water was building up above the grain. After some fiddling, the run off and sparge were balanced so that the water was just level with the top of the grain. The run off speed was slow, which avoids bringing too much sediment through to the boiler.
- As soon as the wort was above the boilers kettle element, I switch on the boiler to started to raise the temperature of the collected wort ready for the boil.
- Sparging was stopped when 23L ish was collected in the boiler

Boiling:
- OK, unless you want to get Divorce papers, now is the time to move out into the garage. Mashing and sparging creates enough smell on its own (although I love it) but boiling will really piss off the wife.
- It took around 30 minutes to get to a proper boil. At this stage I added the first batch of hops and stirred into the boiling wort.
- 30 Minutes later and a rolling boil is looking good. This could be more vigorous but my boiler is already on full whack, so it will have to do. Should be fine.
- Remember, do not be tempted to put a lid on the boiler. You are trying to boil off some chemicals and they will not be able to escape.
- Nearing the last 15 minutes, so I have put the Wort chiller into the boiling wort. This ensures that it is fully sterlilised.
- A dessert spoonful of Irish Moss is also added for last 15 minutes.
- The second batch of hops was added for last 10 minutes.
- After the full 1 hour 30 minutes the boiler was switched off and the final batch of hops were added.


Cooling:
- Connected up the garden hose pipe to the wort chiller and started the cooling process.
- Cooling took longer than expected, around 50 minutes. This is probably because the mains water is not that cold in summer.


Draining and Aeration:
- The cooled Wort was Slowly drained into another bucket.
- First few pints were gently tipped back into the boiler as these were quite turbid. Once it started to pour clear it was left to drain.
- Wort seemed to be reasonable clean and free from trub.
- During the draining the wort also got a good aeration.
- The tube that fits to my boiler tap was re-attached. This ensured that as much of the wort as possible was drawn from the boiler.
- The new hop strainer (see equipment page), worked a treat. This filtered all but the smallest hop residue without becoming blocked. RESULT!!
- Final volume was lower than required due to evaporation, so I topped it up with clean water to 23L.
Fermentation:
- Original Gravity (OG) measurements were taken, which were somewhere around the 1045 mark. This is a bit lower than expected but still an acceptable result. On previous brews I have drained the Mash Tun almost completely before starting the sparging. This has the risk of a stuck mash but I think it is more effecient.
- The wort was around the 22C mark so safe for yeast pitching. I did not make a yeast starter as I have had trouble with these in the past, so just sprinkled the yeast on top of the wort.
- I left the yeast on top of the wort for around 10 minutes to re-hydrate and then stirred in.
- After about 4 hours the fermentation had started and a yeast head was beginning to form.
- 14 Hours in and a good yeast head has now formed, which indicates fermentation well under way. The temperature is back up to around 22C, which is a little high, so I have stood the fermenter in the kitchen sink to try and cool it down.

- Day 2 - There is still a good yeast head. The temperature has again to around 22.9C, so I have put the fermenter back in the sink to try and cool.
- Day 3 - Temperature now down to 21C and yeast head is slowly subsiding.
- Day 4 - Yeast head has now almost completely dropped into wort. There are still plenty of bubbles rising so fermentation is still going well. As fermentation has slowed I have now fitted an airlock. This seems to be bubble about once per minute.
- Day 6 - Airlock has now completely stopped bubbling. Specific gravity was measured at arounds1010 so it seems like fermentation has finished. Some Youngs beer finings were gentle stirred into the beer in order to clear prior to kegging. The aim is to get it in the Keg as soon as possible, where I know it will be safe.
- Just as a test, I ladled some beer into a small glass. It already looks fairly clear, so it should not be long before it can be kegged. Having some fresh beer in a glass also means that it has to be tasted. Even though this beer is nowhere near ready to drink it already tastes fantastic. Now I cannot wait to have this ready for drinking.
Kegging:
- The beer has struggled to clear due to the high temperatures that we have had in the UK in recent weeks. I have not been able to find a cool enough location to ensure that the beer clears effectively. As I did not want to leave the beer under airlock any longer than necessary, I have Bottled & Kegged the beer in its current state. The beer was almost clear so this should be OK.
- I have pressurised the Keg to 30psi. Due to the high ambient temperature, anything less will provide no carbonation. The gas will be left on for 3 days to carbonate.
- The Keg is then stored in the garage for 2-3 weeks to fully condition before drinking.

Tasting Notes:
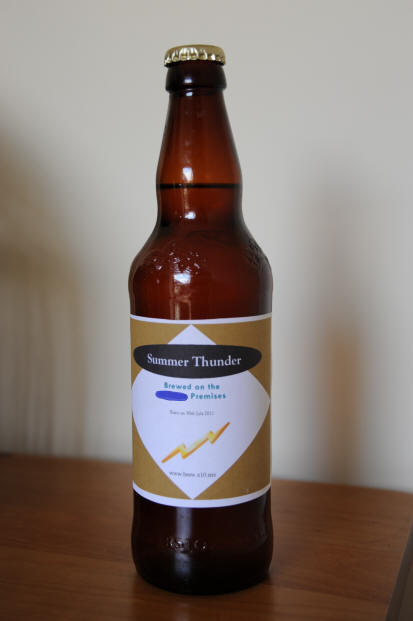
It has now been around 4 weeks since kegging the beer. The bottles have cleared well and are ready to drink, so I connected up the Corny to draw off a few pints.
The beer has a wonderful golden colour with a good clean crisp head. The aroma is just fantastic, with a lovely balance of hops and malt. The mouth feel of the beer is great and immediately gives you the impression that you are drinking a quality beer. There is an excellent soft malty flavour to this beer, which is then followed by a perfect level of bitter after taste from the hops. The only problem is that it is just too nice and easy to drink, it's not going to last long.
This is the first "all grain" brew that I have done for many years and therefore I was not sure how well this would work out. The end result is a beer, which does not smell or taste of homebrew in any way. In fact, I would go as far to say that this is a better beer than you would find in your local pub.
If you are considering moving from Kit Beers to "All Grain" brewing, then I cannot recommend this recipe highly enough.
Happy Drinking!
Contacts
Visit us on Facebook or Email